


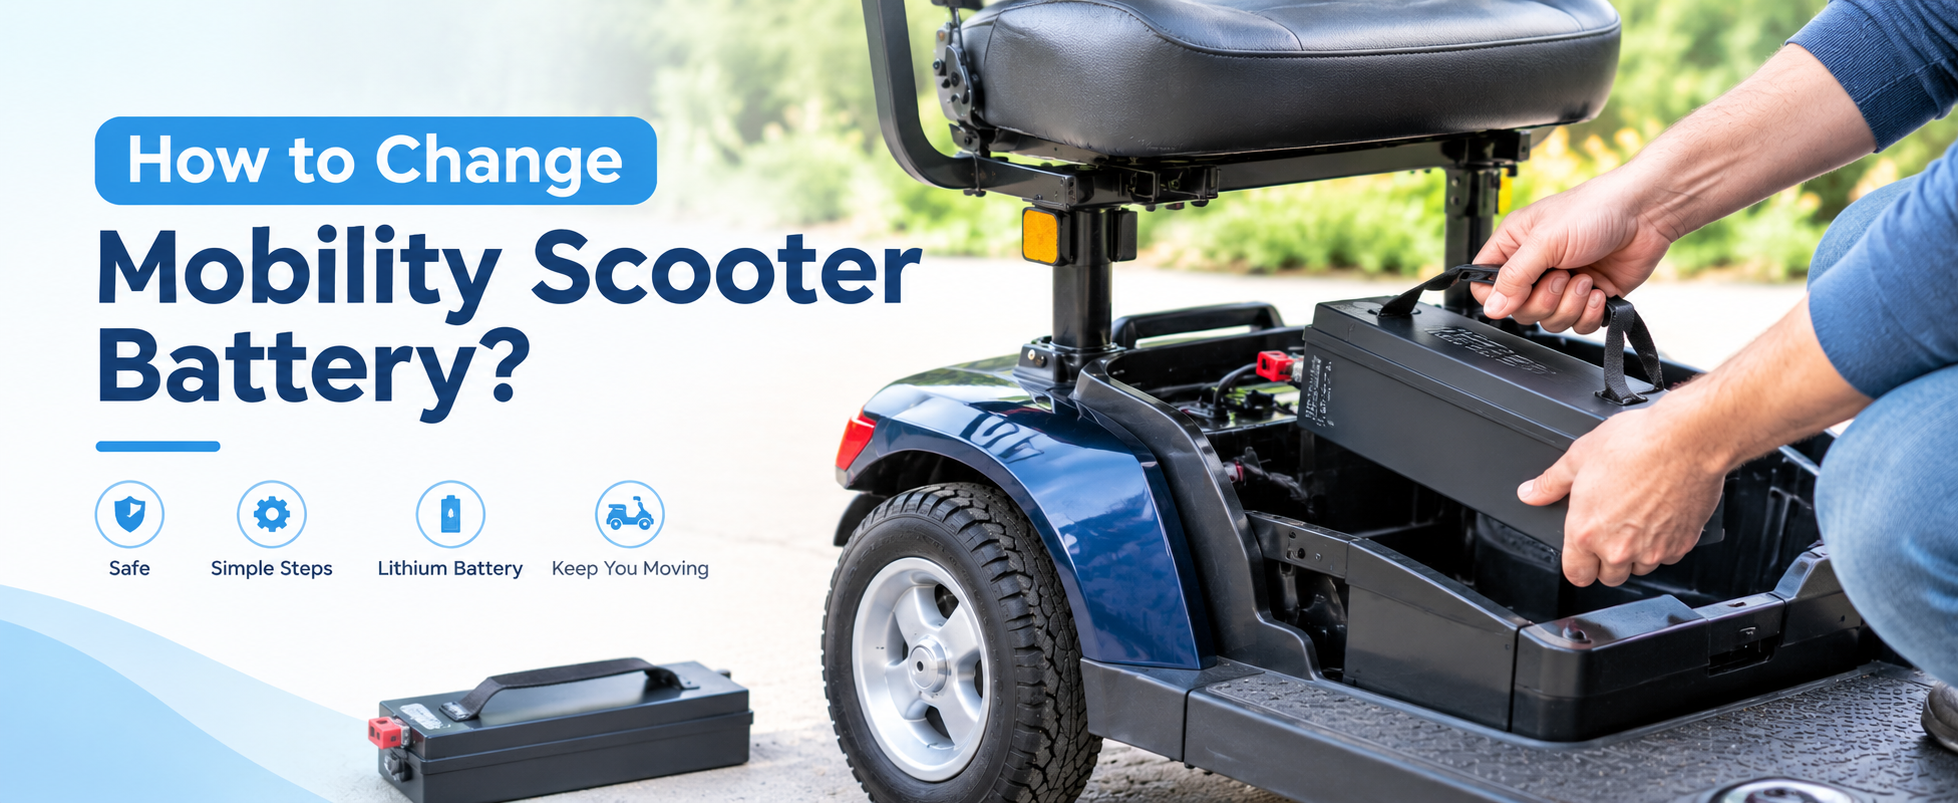
A dead mobility scooter battery will result in less convenient trips to places you usually visit. It can happen that you see the time your scooter operates is reduced, that the battery indicator decreases fast, or that the necessity to charge it very often. However, it would be good to verify if the battery really causes this issue before purchasing a new one.
In case you have an Aotedor KD1 or T550 folding mobility scooter, changing the battery will be simpler than you think. Both of them are equipped with a removable lithium battery. Thus, it is possible to take out the battery in order to charge or replace it without having to open the battery casing. This manual describes what you should look for before changing the battery, how to change it in both models, and what you should clarify before purchasing it.
1. When Do I Need to Replace It?
Lower capacity does not necessarily mean that the battery should be replaced. The battery might just need to be charged, or some other malfunction in the system can be the reason. Consider the following before ordering a replacement.
The scooter operates at lower power. If your battery runs out faster than usual and the scooter fails to operate at normal capacity, try to charge the battery and find out if the issue persists.
The battery indicator shows that you have low battery. On the KD1, the battery status is displayed by the screen. If it appears red, the manual recommends that you charge the battery.
The scooter is reporting an issue with the battery. The KD1 troubleshooting manual identifies issues like low battery and low voltage. With regards to T550, a beep from the scooter could mean that the battery should be charged or that there is a problem with battery connections.
The battery or its connections appear damaged. Never try to use a battery that is physically damaged. Do not try to open the battery pack and repair it yourself. Get in touch with the Aotedor support team.
In case, charging the battery doesn’t help and the scooter still keeps on showing an error, then get in touch with the customer care before buying another battery. It will help to avoid unnecessary replacements of batteries.
2. What You Should Know About KD1 and T550 Batteries
While both scooters utilize detachable lithium batteries, the design of these batteries differs. Ensure that you know which type of scooter you have before removing or purchasing a battery.
|
Feature |
Aotedor KD1 |
Aotedor T550 |
|
Battery type |
Lithium |
Lithium |
|
Battery capacity |
6Ah per battery |
10Ah per battery |
|
Number of batteries supplied |
3 |
2 |
|
Battery arrangement |
Three removable batteries |
Front and rear battery positions |
|
Important detail |
Remove and install batteries using the locking mechanism |
The rear battery is required for operation; the front battery is a spare |
These specifications are based on the respective Aotedor user manuals. Always confirm actual battery compatibility for your specific scooter.
3. How to Replace the Battery on an Aotedor KD1
There is a particular battery removal and insertion process in the KD1 user guide. Take note of the instructions and also use the images from the KD1 user guide to know how the battery locking system works.
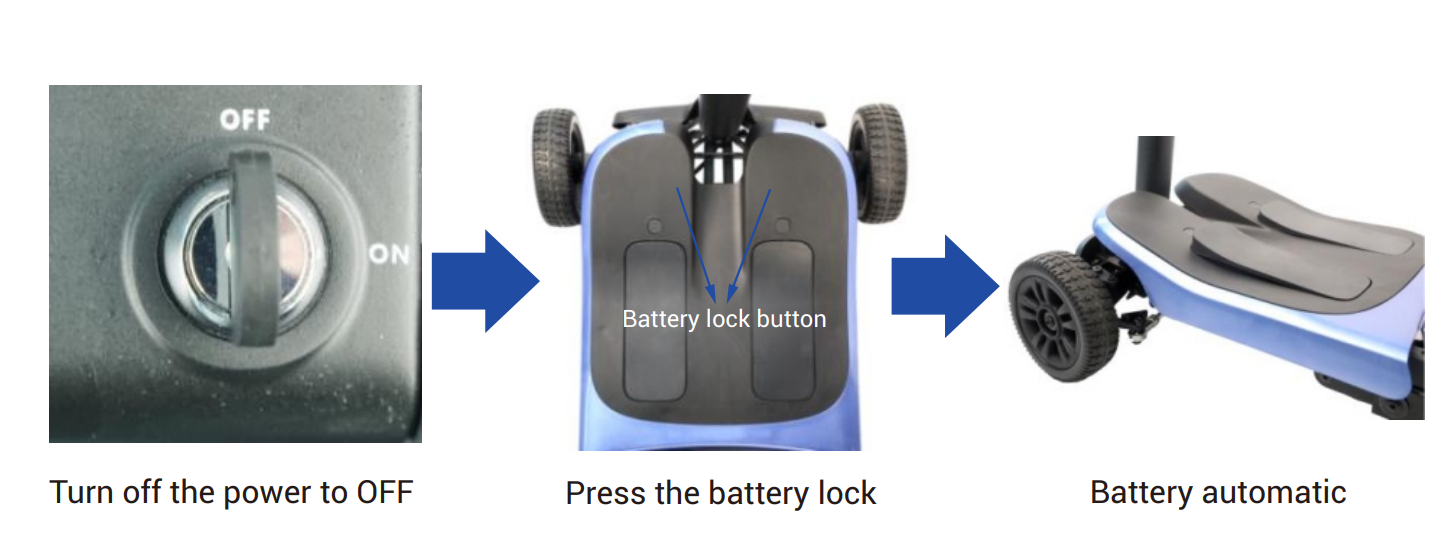
Step 1: Turn the scooter off
Turn the power lock to the OFF position before removing a battery. Do not attempt to remove or install batteries while the scooter is powered on.
Step 2: Release the battery lock
Press the battery lock button. As per KD1 instruction manual, the battery module will automatically pop out after releasing the lock. However, if the battery module does not pop out as expected, do not force it. Consult the picture in the manual.
Step 3: Remove the battery using the handle
Grasp the handle of the battery from the front and remove the battery in the direction indicated in the manual. The same method is applied for the removal of batteries in other locations as required. Make sure to keep track of the batteries that are removed.
Step 4: Installing the new battery
Place the new battery in its designated slot facing the way indicated in the manual. Slide it back until it locks in properly into the electrical plug. There will be a clicking sound once the battery is locked in place. Do the same step on the rest of the slots if you are installing more batteries.
Step 5: Inspect the installation
Before operating the scooter, make sure that all batteries installed in the scooter are properly fitted and locked. Ensure that the batteries are well connected before following the usual charging process described in the manual. In case the batteries do not fit well, the locking mechanism is not functioning, or there is any error message from the scooter, stop immediately and contact Aotedor support.
4. How to Replace the Battery on an Aotedor T550
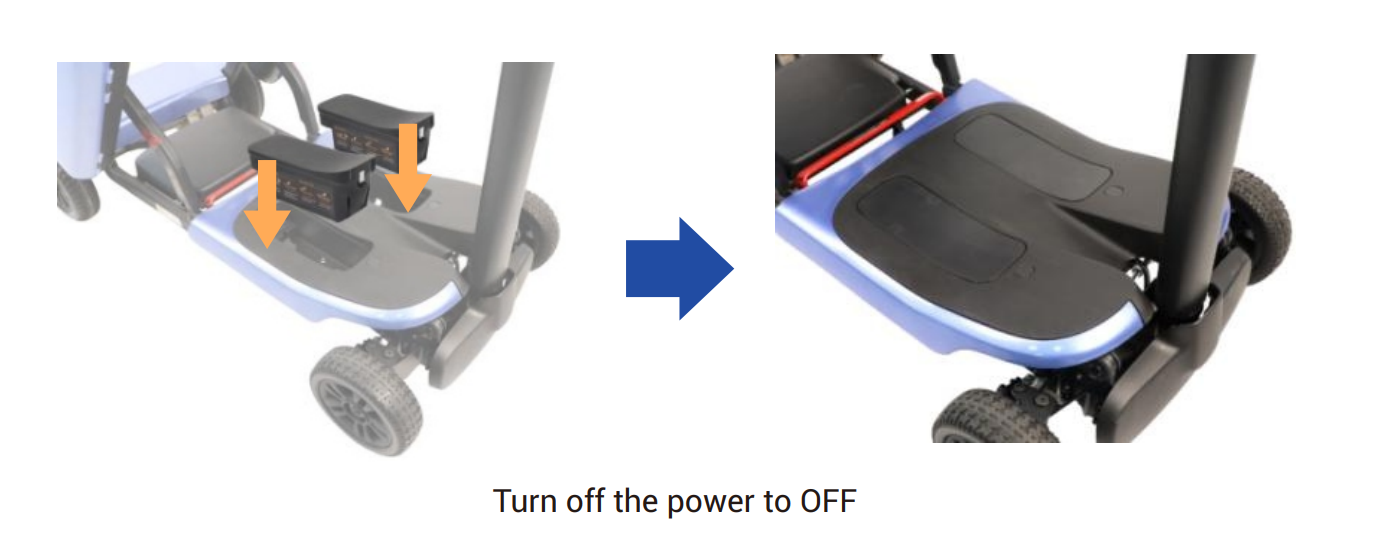
T550 features two detachable 10 Ah lithium batteries in the front and rear positions below the foot plate. Since the T550 has a different battery configuration compared to the KD1, do not expect it to have the same type of locking system for the batteries.
Please refer to the battery image in the T550 user manual while performing the following tests.
Step 1: Turn off the scooter
Make sure the scooter is turned off before working with its batteries. Ensure the charger is not connected, and the scooter is stable.
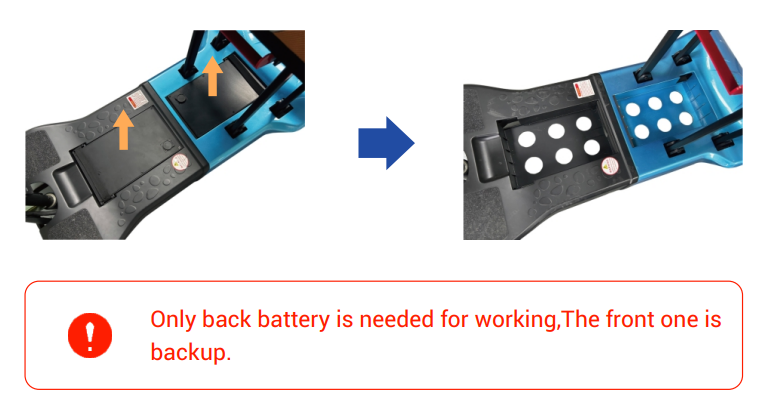
Step 2: Know which battery to check
T550 comes with both a front and rear battery location. It is important to note that the battery at the back is needed for operation, but the battery at the front is only a spare one. In case you are testing your power source for any faults, it is important for you to know which battery to test for problems.
Step 3: Get access to the battery
Use the Remove & Install Battery image from the T550 manual that illustrates how to remove the battery covers located under the foot platform. Open the appropriate cover as illustrated in the manual. Do not force the cover or battery out if it won’t come out easily or if there are any electrical connections in the way. Contact Aotedor for model-specific instructions.
Step 4: Take out the battery carefully
Refer to the illustration in the user manual to remove the battery from its position. It is better to take the battery by its body and avoid pulling out wires or connectors.
The user manual shows the positions where batteries can be found in T550 but lacks a step-by-step description of how to release all the battery components.
Step 5: Insert a fitting replacement battery
Ensure that the replacement battery will work with your T550 and meets the requirements. Install the battery correctly by following the instructions for the particular model.
Step 6: Test battery and charging configuration
After inserting the battery and making sure it is positioned correctly, use the scooter. The owner's manual describes two ways to charge the battery in your scooter:
- How to charge the scooter: Plug the charging cable into the charging port on the scooter controller. The battery must be mounted at the back end, and the controller is able to charge only one battery.
- How to charge the battery individually: Disconnect the battery from the scooter and insert the charger into the battery connector, following the instructions provided in the owner's manual.
According to the manual, while charging, the charger light should be red, and once charging is completed, it should turn green. Once charging is complete, ensure the scooter functions normally.
5. How to Select the Correct Replacement Battery
The fact that the battery resembles the original one does not imply compatibility. Here are some things you should pay attention to before placing an order.
Verify the model of your scooter. Make sure the battery is suitable for your specific Aotedor KD1 or T550. Never make the mistake of thinking that batteries can be interchanged among various scooters.
Look at the battery parameters. In the KD1 user manual, it is stated that there are 6Ah lithium batteries. In the case of the T550, there are 10Ah lithium batteries.
Connector compatibility should also be checked along with the fit of the battery. For example, the battery should fit into its compartment and should connect in a proper way. The battery may not connect if you use a different connector or arrangement of batteries.
Find out how many batteries you need to buy. Three batteries are used in the KD1. There are two places for the batteries in the T550 scooter. However, only the battery in the back position is necessary for it.
In case you do not know what kind of replacement battery you need, ask Aotedor first. Your photos of the battery will help the specialists to find the proper battery.
6. How to Help Your Battery Last Longer
Battery replacement is easy if you do not have to replace it too early. Some basic things will help you in looking after the battery of your scooter.
Charge the battery whenever necessary. Check the battery meter before riding the scooter. According to the KD1 manual, one should charge the battery when its meter changes color to red. Make sure that you follow the proper procedure for charging the battery.
Always use the charger supplied by the manufacturer. KD1 manual clearly asks scooter owners to use the charger supplied along with the scooter. Do not use any other unauthorized charger for the battery.
Keep the battery away from water. Store the scooter and the battery in such a place where there is no moisture and the temperature is appropriate.
Do not allow the battery to become discharged during prolonged periods of storage. According to the T550 instruction manual, one should remove the battery in cases when the scooter is going to be unused for some time, and recharge it before it becomes totally discharged.
Inspect connections upon getting a warning. Battery warning may happen due to a low charge or a poor connection. You should inspect the list of items from your troubleshooting guide first.
7. Frequently Asked Questions
Can I replace an Aotedor mobility scooter battery myself?
The mobility scooters KD1 and T550 both have removable batteries, with instructions provided in the user guide about how to remove and install the battery. In the KD1 instruction manual, instructions for releasing the lock are provided. In the case of the T550, follow the illustrated instructions provided in the manual.
Can the battery be charged without having to remove it from the scooter?
Yes. Charging through the port on the scooter is possible for both models, and their respective manual explains that it is possible to charge the battery when it is removed from the scooter as well. In case of the T550, charging through the controller port needs the battery to be placed at the rear end.
What if my scooter still does not work after I replace the battery?
Ensure that your battery is compatible, well-connected, and placed correctly. Follow all the troubleshooting steps in the manual of your scooter. In case there are still errors or the scooter is not working correctly, then stop troubleshooting and contact Aotedor.
Need Help Replacing Your Aotedor Battery?
Using the right replacement battery, together with proper installation, may prove useful in getting back into your daily rides without many problems. In case you do not know what battery to use for your scooter or how to take it out, Aotedor can help you.
- Email: service@aotedor.com
- Phone: (888) 817-9815
- Support hours: Monday–Sunday, 9 a.m.–5 p.m. EST
- User manuals: Aotedor Manuals & Downloads
Contact us with your scooter model and battery details before ordering if you need help confirming compatibility.


